
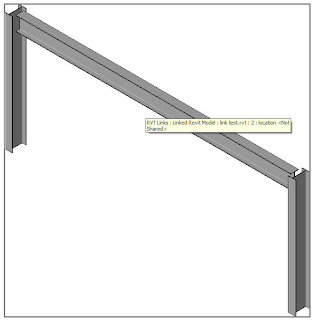
As you would expect it is fully parametric and allows you to enter the Haunch details and adjust the end angle if it is sloping.

As you would expect it is fully parametric and allows you to enter the Haunch details and adjust the end angle if it is sloping.


It can be found in Masterdocs\CAD\Revit\Waterman Library\Families\Annotations and is called W_ANO_X_Banner.
It is also loaded into the Waterman Template
If you hover over the item you wish to hide and hit the tab key to will be able to select it and then hide in view.

 This will wake up the Disallow Join button.
 You now also get a nice little icon showing wich walls have been stopped from joining.
![]()

Strange but true.
If you switch the view discipline from Structural to Architectural then these tools are enabled.
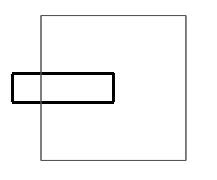
Apply the hidden lines by first clicking the object you want to see through, then the object you want to see under.
Remember to switch your view back to Structural afterwards.
 and you can then draw them at any angle.
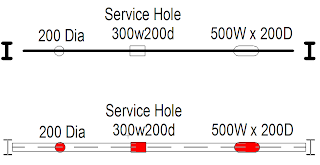 I will now try and explain the procedure required to obtain the results shown above.
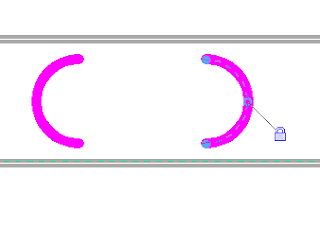
Let's start with the circular hole ( W_GEN_Beam Service Hole Circ.rfa ). When loaded this can be found under Generic Models.
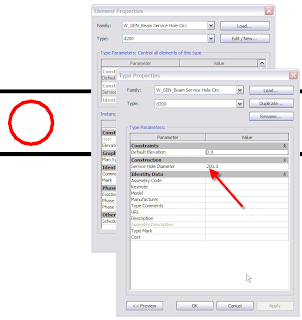
Go to an elevation of the beam and drag and drop the circular hole family onto it. In this view the outline of the hole is shown in invisible lines, although you can still see and select them when you hover over them as is normal in Revit. Then using Opening By Face cut a hole directly on top of the invisible lines. Use the Pick Lines for the top half and lock the two together.
 Draw the bottom half using the Line Arc tools.
 Finish sketch. You now have your opening locked and aligned to the invisible lines in the family.
 Then draw in the connecting lines without locking and aligning them. This is important because if you do you will over constrain the hole and start getting error messages.
  Finish sketch. You now have your opening locked and aligned to the invisible lines in the family.
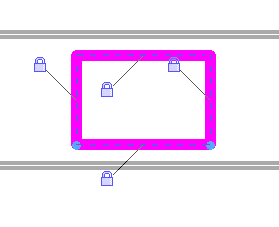 Finish sketch. You now have you pening locked and aligned to the invisible lines in the family.


Easy now we know !!!!
Thanks to Simon Jones for showing me this.

Once loaded you can drag and drop it onto your slab, but, the trick is to select Place on Face from your options menu.
