Showing posts with label Schedule. Show all posts

Friday, 25 March 2011

Schedule those Levels - A Method (with a little help from our friends)

This post outlines a method for scheduling levels using the excellent 'Coordinate Scheduling Tool' from the guys over at Excitech.

This method provides a pretty robust workaround to the absence of the ability to directly schedule the levels themselves

Firstly, download and install the utility from here


With reference to the video, the main points are as follows:


  • Create a new Generic Model Family. The family will essentially be empty, but for reference, add some symbolic detail. This can be whatever floats your boat, but in this case I've added a circle.
  • Under the 'Type Comments' parameter formula box, add the word 'Level'. This will allow us to isolate the family once its loaded into the project. 
  • Under the family category parameters, make sure 'Always Vertical' and 'Work Plane Based' are checked
  • Load the family into the project. Under 'Addin' tab, on the 'Excitech Tools' panel, select 'Create Parameters'. Check 'Generic Models' and apply.
  • Create a new design option set called 'Level Marks'. Rename the primary option to 'Blank' and create a second option called 'Level Marks'
  • In a plan view, set the design options to 'Level Marks' and insert the Generic Model family. In this case, at a known grid point. Ensure 'Place on Work Plane' is selected
  • Copy the symbol to the clipboard and select 'Paste', 'Paste to Selected Levels'. Highlight and pick the remaining levels
  • Set the design option back to 'Main Model'. The symbols will now disappear. This provides some control by locking away the symbols, so they cannot easily be deleted
  • Create a new multi-category schedule called 'Level List'
  • Add the parameters 'Family', 'Type Comments', 'Level' and 'ExcitechZ'
  • Add a new calculated value 'Level (m)'. This is to convert the 'ExcitechZ' parameter from millimetres to metres, so divide it by 1000 in the formula
  • Under the 'Filter' tab, set to 'Type Comments' equals Level
  • Under the 'Sorting/Grouping' tab, set to 'Level' and check ascending (or descending if that's your preference). Uncheck 'Itemize every instance' (this will mean only one entry will show, even if the level contains more than one instance of the symbol)
  • Under the 'Formatting' tab, set to 'Family','Type Comments' and 'ExcitechZ to hidden. For the 'Level (m)' parameter, amend the field format to 3 decimal places. Ensure suppress trailing zeros is unchecked. Apply and hit ok
  • In the schedule parameters, under visibility/graphics, set the design option to 'Level Marks'
  • Under 'Addin' tab, on the 'Excitech Tools' panel, select 'User Options'. Check 'Generic Models'. Select the 'Coordinate Schedule' button. The level values will now populate the schedule

Please note the tool will need to be re-run if the levels change.  When you add a level, re-enter the design option, copy an existing symbol and paste to the new level. 

Wednesday, 26 January 2011

Steel Weight - A Conversation, Further Thought and Another Method


  • A Conversation
Mike: "So, the Revit weight schedule calculates using volume?"


Me: "Yes"


Mike: "So when you put a service hole in a beam, it subtracts it from the volume?"


Me: "Yes"


Mike: "But when you buy steel, it doesn't come with holes in. Shouldn't the weight takeoff reflect this?"


Me: "Ahh... Good point"


  • Further Thought
In order to overcome this, the weight can be calculated using kg/m multiplied by length. In my mind, this presents a couple of issues:

  1. How to get a steel length from a column
  2. How to make it multi-category, so it all appears on one schedule
Fortunately, our families all contain cross-sectional area figures 'A', calculated automatically by formula based on the parametrics of the profile. The kg/m value 'M' is calculated from this:


  • Another Method

The solution to both problems is to introduce a new shared parameter, 'Section Length' to all the steelwork families. This is set to 'instance' and set as a reporting parameter. A dimension is then run from one end of the beam/column to the other and is set to this parameter. Because it is a reporting parameter, whatever length the beam/column is, its value is fed back to 'Section Length'. This can then be used to calculate the weight. The following video demonstrates this concept


Sunday, 23 January 2011

Steel Weight - A Method and Some Thoughts


There are a lot of bit and pieces online regarding steel weights in Revit Structure. The aim of this post is to pull some of it together and to add my own thoughts. The video goes through the procedure for creating the schedule and the information below discusses the finer points
  • Before You Start, Content is Critical

We abandoned the OOTB steel families early on and generated our own family content. This allowed us to take a much more holistic approach to the content. In the video example, there are 'Universal Beam' members of both 'Structural Column' and 'Structural Framing' Categories. These families are driven by identical parameters, profiles and most importantly, Type Catalogues. All our steelwork families contain two parameters, 'Section Type' and 'Section Name'. These are only ever used in Steel Families and they allow us to isolate steelwork in schedules. In the case of the example, the values of these two parameters are consistent in both 'Universal Beam' of 'Structural Column' and 'Structural Framing' categories. This allows us to consolidate all 'Universal Beam', regardless of family category, together in a multi-category schedule


  • Some Points on Volume

    In the 'Material Take-Off' schedule, the parameter 'Material : Volume' is used to calculate the weight. The material parameters in Revit Structure are only available for the following family categories:


  • Revit will calculate volume based on the medium level of visibility. Another reason we abandoned the OOTB families is that for all rolled sections, the root radii are omitted in the medium level of detail, so the weights were coming out incorrect. Hence our content shows a full profile for both medium and fine detail to get the correct volume.

  • The calculated value in full is Volume multiplied by Density. The syntax is:
    (Material : Volume/1)*7.85
  • The parameter 'Material : Volume' must be divided by 1 to neutralise m³ to a number to avoid an 'Inconsistent Units' error.
  • 7.85g/cm³ is the metric density value of mild steel (in old money, this is 0.284 lb/in³).
  • Elements must have physical material applied to them in order to appear in the schedule. I'd recommend that a generic steel material is applied in the family by default so they will show up regardless

So that pretty much sums it up. Hopefully this will be of some help

Thursday, 17 September 2009

We have added a new Schedule to our Template.

This new Schedule will give a total weight of steelwork as long as you have used the Waterman Families in the model. I'ts also dependant on a material being assigned to the steel ( i.e. not left to be ).
You can also copy and paste this schedule into existing projects from \Masterdocs\CAD\Revit\Waterman Library\Families\Schedules but, again I would point out it will only work correctly if using Waterman Families and Materials are assigned.

Wednesday, 6 August 2008

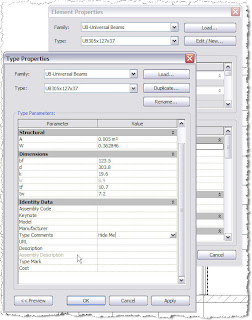
The ability to not show something in a Schedule.

Sounds a bit daft I know, but, you never know. You may want to schedule all your steelwork at a certain level but not the trimming/secondary steel. The following steps will help you acheive this.

1. Choose a parameter that you wish to use as your Filter ( for this example I will use the Type Comments Parameter ).
2. Add the Type Comments field to your schedule.
3. Give the Type Comments parameter a value for the items you don't wish to see in your schedule ( for example: Hide Me ).
4. On the Filter Tab of the schedule set the following: Filter by: Type Comments -> does not equal -> Hide Me

Thursday, 26 June 2008

Waterman Reference Schedule

In the Standard Template I have made a schedule for use with the Waterman Abbreviated Naming.
It is set up to schedule by level. The one that’s in the Template schedules all beams on Level 1.

To change it to schedule a different level …. Go to the properties of the schedule and the Filter Tab and change the Reference Level to suit your requirements.